Lesson: Working with Images

Back to Tutorial Index

Images add character and life to email messages. They are great to promote your brand and to get customers to engage effectively.

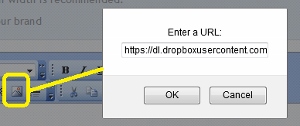
simplyFYI provides easy-to-use tools to embed images into your emails. But before we get into the how, its important to understand a few things about images and emails.

Images render differently based on the email client program. For example, emails render very in Outlook as compared to say Gmail. This is more so with images.

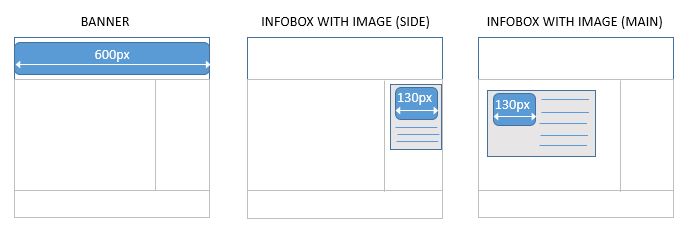
Here are some rules of thumb to remember. By following these guidelines, your images will render nicely across most od the popular email client programs.

Gudelines for using images

  1. Make sure that you size your images exactly to how you want them to appear. In other words, do not insert a large image and resize it using the editor. Some email clients ignore the resizing and display the larger original image.

  2. Use an image editor like Microsoft Paint to resize your images.

  3. Upload your images (resized) to a public location on the web. A great option is DropBox. It's free and very intutive to use. Use the public link to the uploaded images to insert images into newslettes.

  4. Save images as .JPG files and not .PNG files. This is because not all email client programs (like Lotus Notes) support .PNG images.

  5. The following are maximum image widths that we highly recommend to use with simplyFYI:


How to insert an image

  1. Click the image icon on the toolbar. The "Enter a URL" window will pop up.
    imagebutton

  2. Enter the URL (public location) of the image. Click "Ok".
    inbox
  3. Do the same to change the image.

How to add a hyperlink to an image

To open a new webpage when the user clcik the image, you need to add a hyperlink to the image.

  1. Click the hyperlink icon on the toolbar. The "Enter a URL" window will pop up.
    hyperlinkbutton

  2. Enter the URL (public location) of the linked webpage. Click "Ok".
  3. Do the same to change the hyperlink.