Send Welcome Emails to New Subscribers
|
||
1- Create a FYI |
||
|
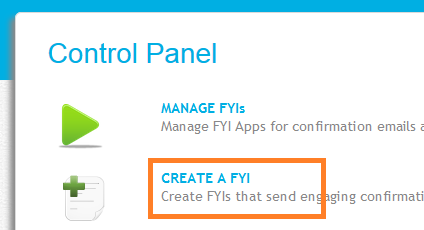
Go to simplyFYI Control Panel. Click: Create a FYI. | ||
|
||
2- Select the "Subscription" option |
||
|
In the "Select PayPal payment method to engage on" drop down, select "Subscription". Then click "Create App". 
|
||
3- Select "New Subscriber Signup" Option |
||
|
From the list of subscription triggers, select "New subscriber signup - Create welcome email". Then clicn "Next". 
|
||
4- Give your FYI a Descriptive Name |
||
|
Enter Enter a name for your new FYI. Then, click Next. 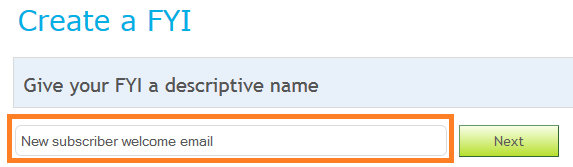
|
||
5- Design the Welcome Email |
||
|
Use the simplyFYI Editor and design your welcome email. TIP: Under the "Payment Confirmation" tab, delete the default content and select "New subscriber welcome email" from the "Select New Subscriber Welcome Template" drop down. Click "Save" to save your work. Click "Preview" to preview your email. Click "Send Test Email" to send yourself a test email. 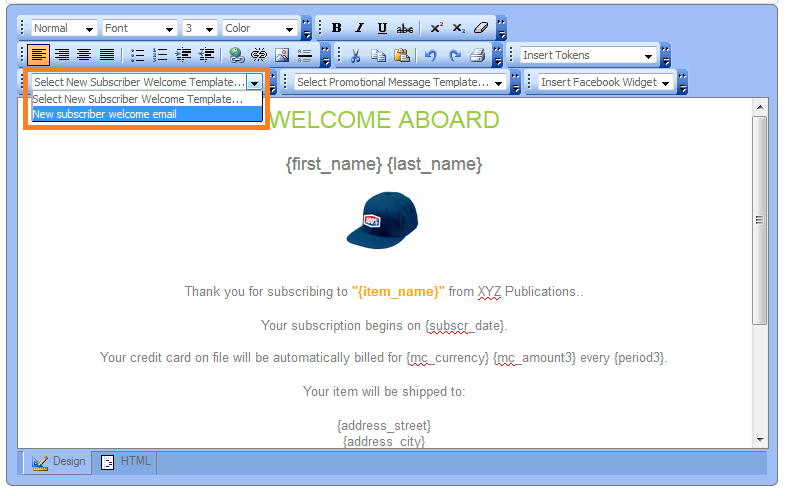
|
||
6- Activate this FYI |
||
|
||
|
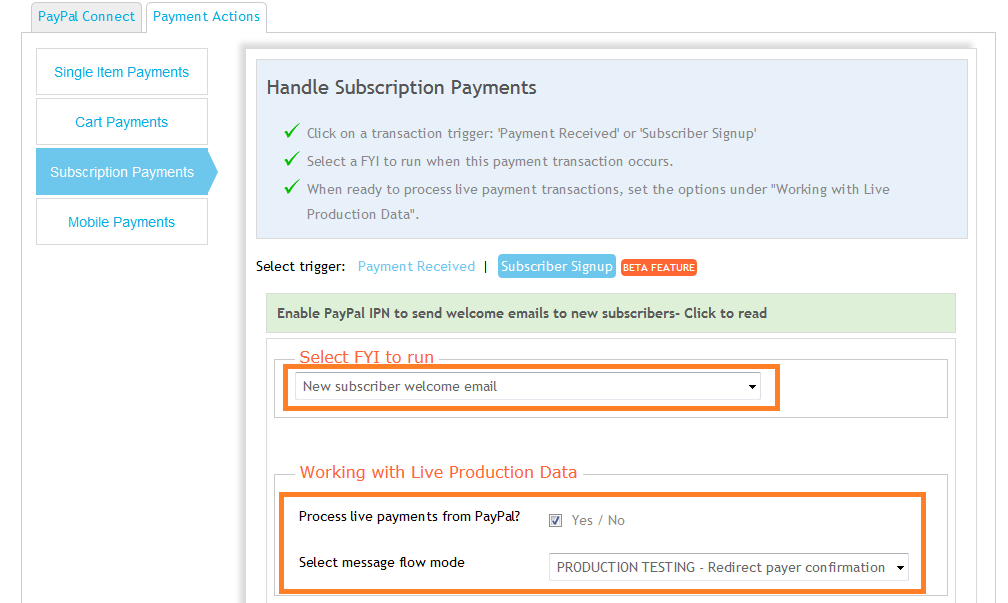
1. Go back to the Control Panel by using the dropdown menu under your name in the top right corner of the screen. 2. Click "Manage Account Settings" -> "PayPal Settings" -> "Payment Actions" -> "Subscription Payments" -> "Subscriber Signup". (see image above) 3. Under "Select FYI to run", select the FYI that you just created. 4. Check "Process live payments from PayPal". Select "PRODUCTION TESTING" for "Select message flow". 5. !!IMPORTANT!! When you select "PRODUCTION TESTING" welcome emails will be sent to your email address but not your new subscriber. This allows you to make sure that the welcome email looks right. Once you are satisfied with the email, come back here and select "PRODUCTION". Only the will send welcome emails to your new subscribers. 6. Read these instructions and complete the steps by logging into your PayPal account. 7. Now you are all set to send your beautiful welcome emails to new subscribers. |
||